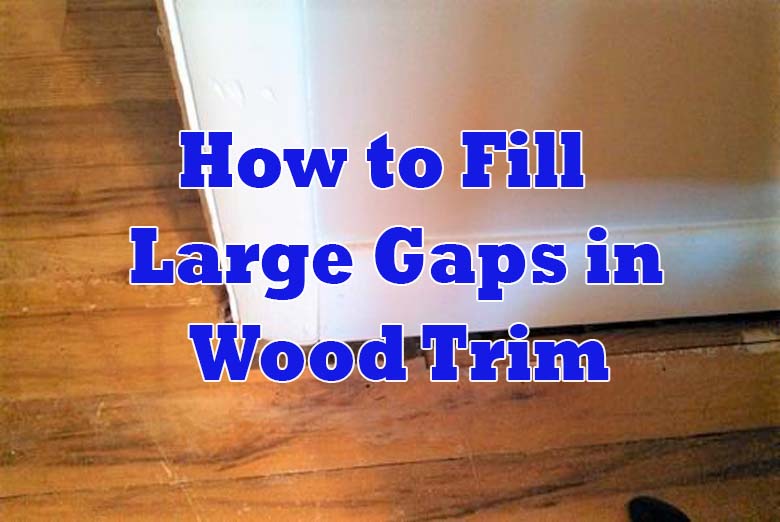
Wood trim adds a touch of elegance and sophistication to any interior space, but over time, gaps may develop due to various factors like settling of the house, changes in temperature and humidity, or simply poor installation. These gaps can be unsightly and compromise the aesthetic appeal of your home. However, fret not, as we will guide you through the process of filling large gaps in wood trim to restore its beauty and integrity.
What is Wood Trim?
Wood trim refers to the decorative and protective molding used along the edges of walls, windows, doors, and ceilings. It enhances the architectural features of a room and provides a smooth transition between different surfaces.
Importance of Maintaining Wood Trim
Apart from its aesthetic value, wood trim also serves a functional purpose by protecting the edges of surfaces from damage and wear. Properly maintained trim can significantly extend the lifespan of your walls, doors, and windows.
Understanding Large Gaps in Wood Trim
Causes of Large Gaps
Large gaps in wood trim can occur due to various reasons, including natural settling of the building, seasonal expansion and contraction of wood, or poor craftsmanship during installation.
Identifying the Severity of Gaps
Before proceeding with any repairs, it’s crucial to assess the severity of the gaps. Some gaps might be superficial and require minimal intervention, while others may need more extensive repair work.
Preparing for Gap Filling
Necessary Tools and Materials
Before you begin, gather the necessary tools and materials, including wood putty, wood shims, wood molding, wood strips, sandpaper, paint or stain, and a caulking gun.
Safety Precautions
Working with wood products and tools can be hazardous. Remember to wear appropriate safety gear, such as safety goggles and gloves, to protect yourself during the repair process.
Filling Large Gaps with Wood Putty
Selecting the Right Wood Putty
Choose a high-quality wood putty that matches the color and type of your existing wood trim. This will ensure a seamless and natural-looking repair.
Step-by-Step Application Process
- Clean the gap and surrounding area of any debris or dust.
- Apply the wood putty into the gap using a putty knife, pressing firmly to fill it completely.
- Smooth the surface of the putty with the putty knife, removing any excess.
- Allow the putty to dry completely before sanding it smooth.
Using Wood Shims to Fill Gaps
Choosing the Correct Size and Type of Shims
Select wood shims that are the appropriate size and shape to fit snugly into the gaps. Ensure they are made from the same type of wood as your trim.
Installation Procedure
- Insert the wood shim into the gap, tapping it gently with a hammer if needed.
- Trim any excess shim material to make it flush with the surface.
- Sand the shim to smooth out any rough edges.
Closing Gaps with Wood Molding
Types of Wood Molding for Gap Filling
Choose the right wood molding style that matches your existing trim. Options include crown molding, baseboards, and quarter rounds.
Cutting and Installing Molding
- Measure the length of the gap and cut the molding accordingly.
- Attach the molding to cover the gap using finishing nails and a hammer.
- Fill any nail holes and gaps with wood putty and sand it smooth.
Repairing Large Gaps with Wood Strips
Sizing and Preparing Wood Strips
Measure and cut wood strips to fit the size of the gap. Ensure they are of the same wood species as your trim.
Affixing the Strips to the Trim
- Apply wood glue to the back of the wood strip and press it firmly into the gap.
- Secure the strip in place with finishing nails, if necessary.
- Sand the surface to blend the strip with the trim.
Blending and Finishing Techniques
Sanding and Smoothing the Surface
After filling the gaps, sand the repaired areas to create a smooth and seamless finish.
Painting or Staining the Trim
Paint or stain the entire trim to ensure a consistent color and finish, making the repaired areas virtually indistinguishable from the rest of the trim.
Preventing Future Gaps
Tips for Proper Wood Trim Maintenance
Maintain your wood trim regularly by cleaning, inspecting, and addressing any minor gaps before they escalate.
Addressing Potential Causes of Gaps
Identify and address the underlying causes of gaps, such as structural issues or changes in temperature and humidity, to prevent future occurrences.
Frequently Asked Questions (FAQs)
Can I use caulk to fill large gaps in wood trim?
Using caulk to fill large gaps is not recommended, as it lacks the strength and durability of wood putty or shims. Caulk is better suited for smaller gaps and as a sealant.
What is the drying time for wood putty?
Drying times for wood putty can vary depending on the brand and type. It’s best to follow the manufacturer’s instructions, but typically, it takes 1-2 hours to dry completely.
How do I know if the wood putty color matches my trim?
Before application, test the wood putty on a small, inconspicuous area of the trim to ensure the color is a close match. Consider using a stainable putty for better color blending.
Can I use reclaimed wood for filling gaps?
Yes, reclaimed wood can be used for filling gaps if it matches the type and color of your existing trim. It adds a rustic charm to the repair.
Is it possible to fix gaps without removing the trim?
Yes, depending on the severity of the gaps, some methods like using wood putty or shims allow for gap filling without removing the entire trim.
Conclusion
Filling large gaps in wood trim may seem like a daunting task, but with the right tools and techniques, it is a manageable DIY project. Regular maintenance and prompt repairs can keep your wood trim looking pristine and extend its life. Remember to choose the appropriate method for the size and severity of the gaps, and don’t forget to finish the repair with sanding and painting or staining for a flawless finish. With a little effort and know-how, you can restore the beauty of your wood trim and elevate the overall look of your living spaces. Happy repairing!