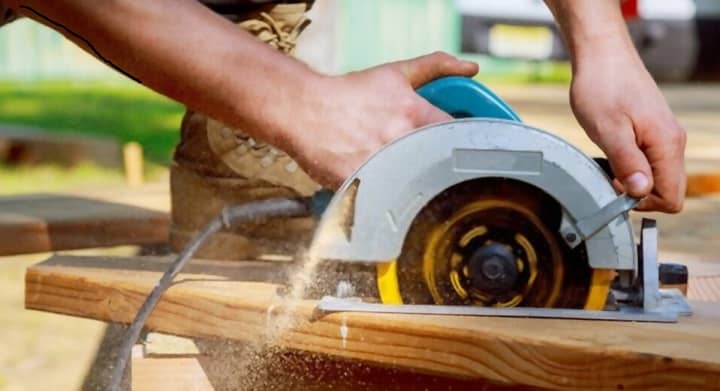
Admittedly, table saws work best to rip narrow boards such as 1/8-inch boards for furnishing works. But what if you don’t have a table saw available at hand?
Will you leave your rip cuts on the narrow boards?
Certainly not!
You can still and profoundly use a circular saw to perform long rip cuts on narrow boards. And for your convenience, today’s tutorial discusses how to rip narrow boards with a circular saw.
Although people believe that working on a long piece of an incredibly narrow board such as ¾” or ½” with the circular saw is challenging, you can do a much better job. All you have to do is to follow the instructions listed below.
Is It Difficult to Use Circular Saw to Cut Narrow boards?
All woodworkers would own a circular saw for its portability and incredible cutting efficiency. It brings immense accuracy and precision in every cut, which you would love.
Nonetheless, when performing rip cuts on narrow boards, the circular saw lags behind the table saw. The problem of working with the circular saw is that its standard guide will come in between the cutting material and the motor.
Hence, it becomes difficult to tackle the narrow boards for cutting. But you can bypass such difficulties with our step-by-step guideline for ripping with a circular saw. Hence, before you begin, it is recommended that you clamp the saw guide on the table securely. Also, make sure that the saw blade is rotating properly below the sole of the circular saw.
How to Rip Narrow Boards with a Circular Saw
While many people consider ripping narrow boards with a circular saw difficult, it is relatively straightforward. You won’t have to be a master woodcutter for it.
Time: Less than 1 hour
Difficulty level: Beginner to medium
Here, we will effectively talk about how to rip 2×4 with a circular saw. So, let’s begin it.
Things you would need:
- Pencil and square,
- Measuring tape,
- A wooden board,
- A stand
- A pair of clamps,
- A circular saw.
Step 1: Preparing the Working Platform
The platform is where you would put the narrow wood board and use the circular saw to rip through it. For platforms, pick the wood piece that is straight, long, and even all the way. Depending on the height where you would work, you might need multiple slabs.
Also, make sure you get a thicker slab as a platform than the cutting board. Lastly, the table must be higher than the workpiece so the saw blade can easily reach the wood.
Step 2: Ensuring the Safety
Whenever you work with any power tool, always make sure you abide by safety rules. Wear a safety goggle and gloves for protection. Also, wear tight-fitted clothes since loosely fitted cloth might connect with the blade and cause finger injuries.
Step 3: Circular Saw Clamping with The Platform
You will have to clamp the circular saw with the already prepared platform. The clamping needs to be done in two points between the platform and circular saw sole. Sometimes, the clamping might feel a bit lost. In such cases, use additional wood bits to tighten the sole with the platform correctly.
Step 4: Reference Cut and Adjusting the Width
Once you have found the circular saw front, feed a piece of wood through its blade. It will work as a reference cut for the actual narrow board ripping session. The circular saw front is actually in the direction you push the saw blade.
Step 5: Adjusting the Blade with The Working Platform
The blade should face the working platform parallel. To adjust the blade, you will need the help of two reference wood pieces. The 1st one is already you have cut with the saw blade. For the second reference cut, feed a sacrificial wood piece from the front of the edge.
Once the cut is completed and the wood piece is positioned underside, feed it from the saw’s back also. Also, make sure you have removed the circular saw blade guard to prepare the 2nd reference cut. As you position the two reference cuts, they should align at a similar point with perfect lining.
If the alignment isn’t at the same point, adjust the blade properly until it has the perfect alignment with the reference wood pieces. It is essential because without the blade adjusting parallel to the platform, the blade would bend while ripping the narrow board.
Step 6: Adjusting the Blade Height
The cutting piece would be on the worktable. So, you will have to align the saw blade height with the working part. At first, position the blade on the wood board. Now check how much adjustment you need to make.
\We recommend you to use thick paper to slide underneath the saw to adjust the height easily. The paper should also be flat and pass the blade only slightly without disturbing the modified reference cuts with it.
Step 7: Ripping the Board with The Circular Saw
Before you begin the 1st cut, make sure the parallel alignment is appropriately done with the blade and reference cuts. Also, make sure the blade has reached its right speed to rip through the working piece smoothly.
Before you begin the cut, use a measuring tape to measure the right width and length you will need correctly. Outline it with the pencil for precise and accurate cuts.
Once the cutting outline is ready, you can proceed to the final step. For this, press the saw trigger and allow it a few moments to come at the desired speed. Then lock the saw blade and feed the narrow piece of wood to the blade.
Conclusion
We hope now you know how to rip narrow boards with a circular saw without damaging the board or the saw blade itself. It is actually and practically much more comfortable than most woodworkers think. Nonetheless, the key to cutting the narrow board precisely depends on the alignment of the saw blade parallel with the prepared platform.
Hence, you must make sure that the saw blade adjustment with the two reference cuts is perfect right at the point where the two cuts meet. It will help you get the desired cuts without any effort and hardships on your side.


